Posted by Kasten on 4th May 2021
Kasten Quick Start Kubernetes
Add the Kasten Helm 10 repository
Let's start setting our environment up by adding the the Kasten K10 Helm repository to the system:
helm repo add kasten https://charts.kasten.io/
Install MySQL and Create a Demo Database
To experiment with backup and recovery of a cloud-native application, we will install MySQL and create a database in this step.
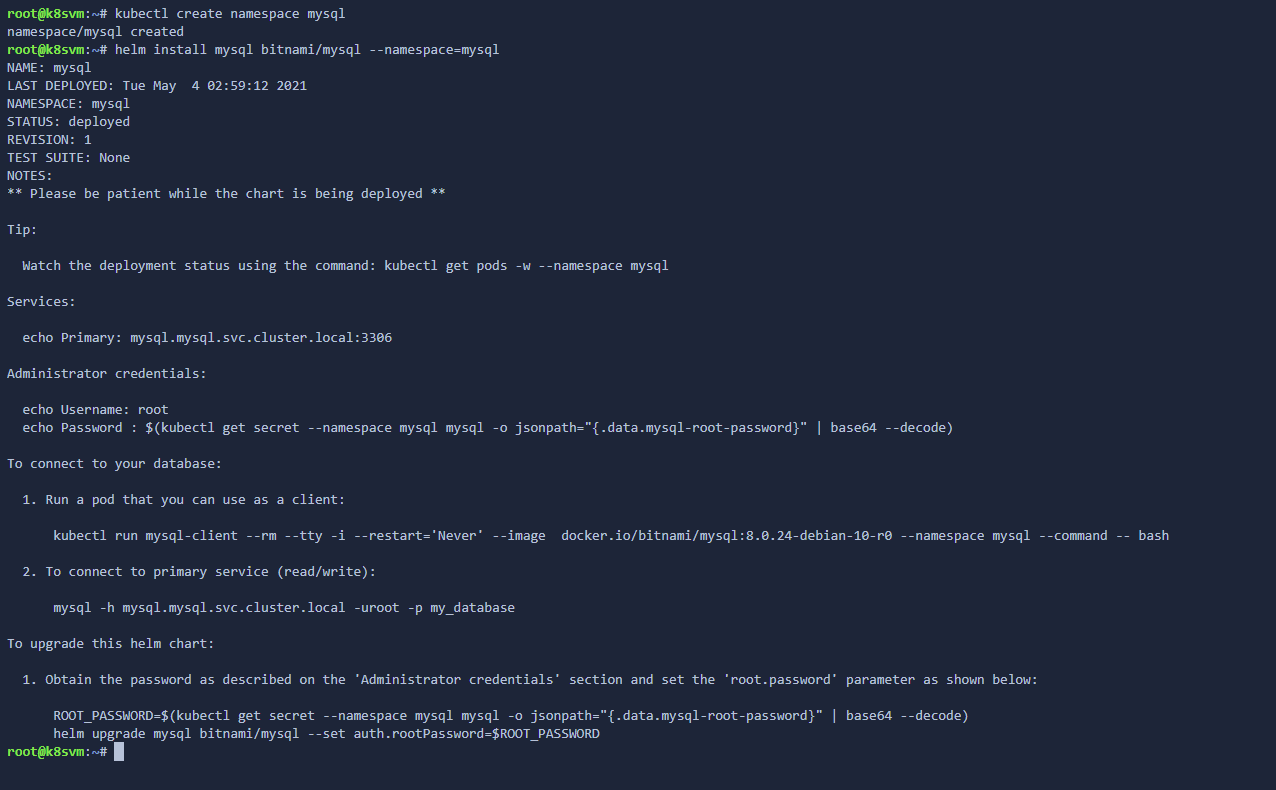
First, install MySQL using the following commands:
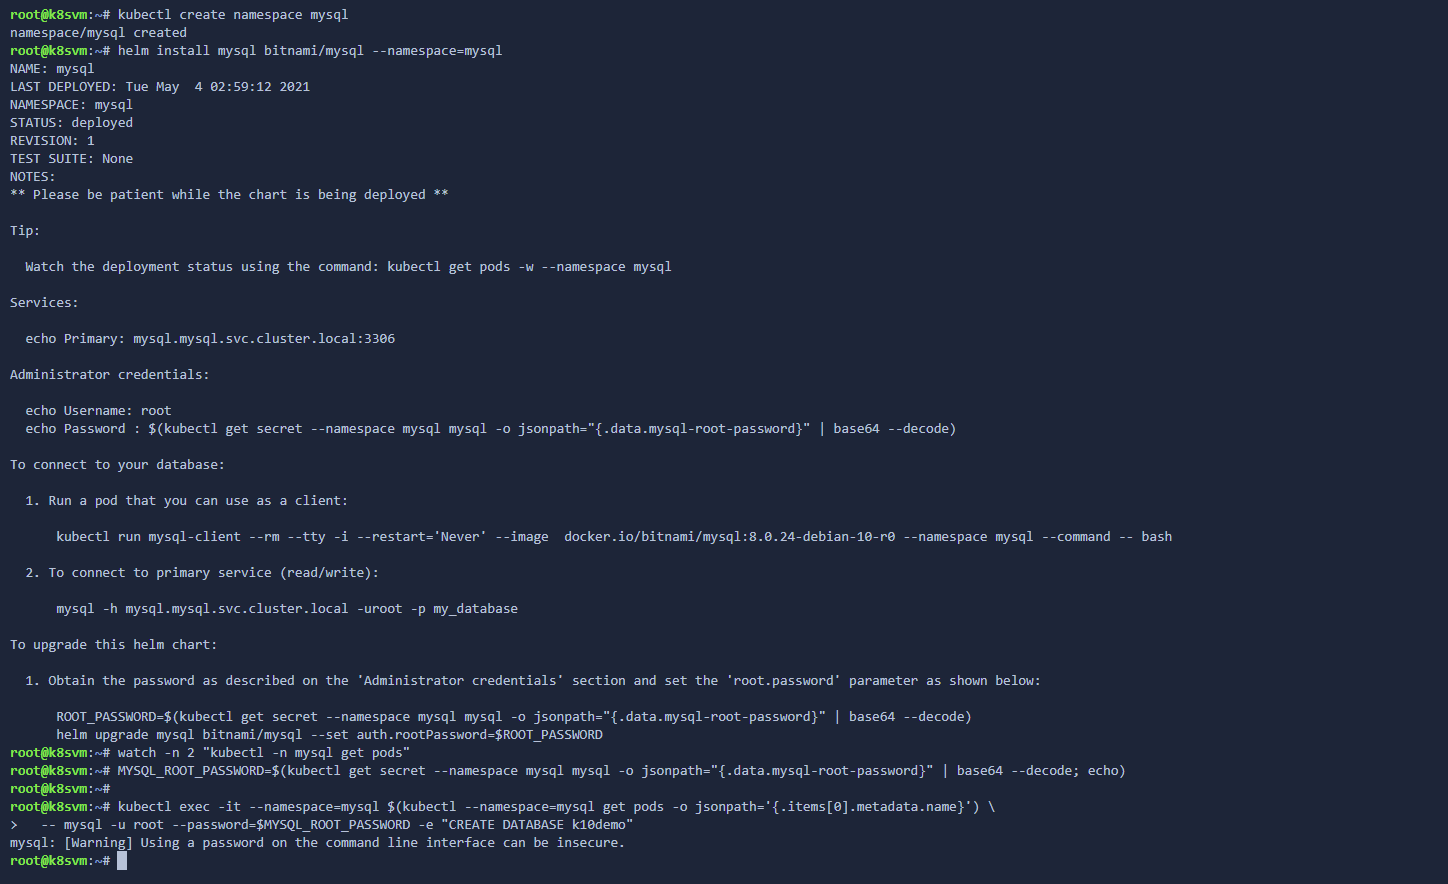
kubectl create namespace mysql
helm install mysql bitnami/mysql --namespace=mysql
To ensure that MySQL is running, check the pod status to make sure they are all in the Running state:
watch -n 2 "kubectl -n mysql get pods"

Once all pods have a Running status, and Ready is 1/1, hit CTRL + C to exit watch and then run the following commands to create a local database.
MYSQL_ROOT_PASSWORD=$(kubectl get secret --namespace mysql mysql -o jsonpath="{.data.mysql-root-password}" | base64 --decode; echo)
kubectl exec -it --namespace=mysql $(kubectl --namespace=mysql get pods -o jsonpath='{.items[0].metadata.name}') \ -- mysql -u root --password=$MYSQL_ROOT_PASSWORD -e "CREATE DATABASE k10demo"
Note: If the pod has not completely become ready, the previous command will fail - if it does fail, wait a couple seconds and try again
Install K10 and Configure Storage
Install Kasten K10
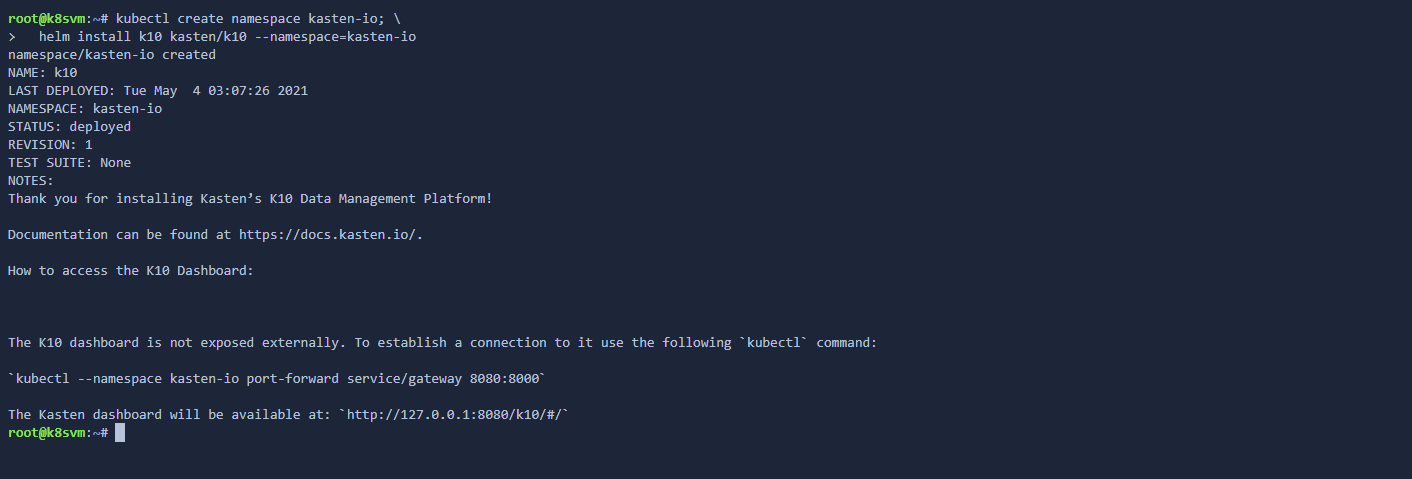
In this step, we will actually install K10 by running the following commands:
kubectl create namespace kasten-io; \
helm install k10 kasten/k10 --namespace=kasten-io
To ensure that Kasten K10 is running, check the pod status to make sure they are all in the Running state:
watch -n 2 "kubectl -n kasten-io get pods"
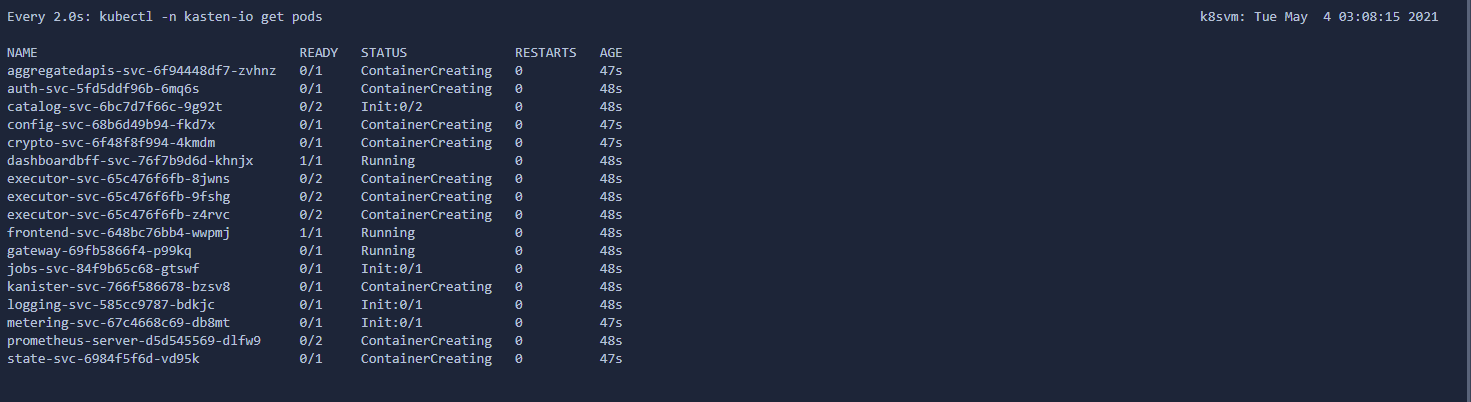
Once all pods have a Running status, hit CTRL + C to exit watch.
Configure the Local Storage System
Once K10 is running, use the following commands to configure the local storage system.
kubectl annotate volumesnapshotclass csi-hostpath-snapclass k10.kasten.io/is-snapshot-class=true

View K10 Dashboard
Expose the K10 dashboard
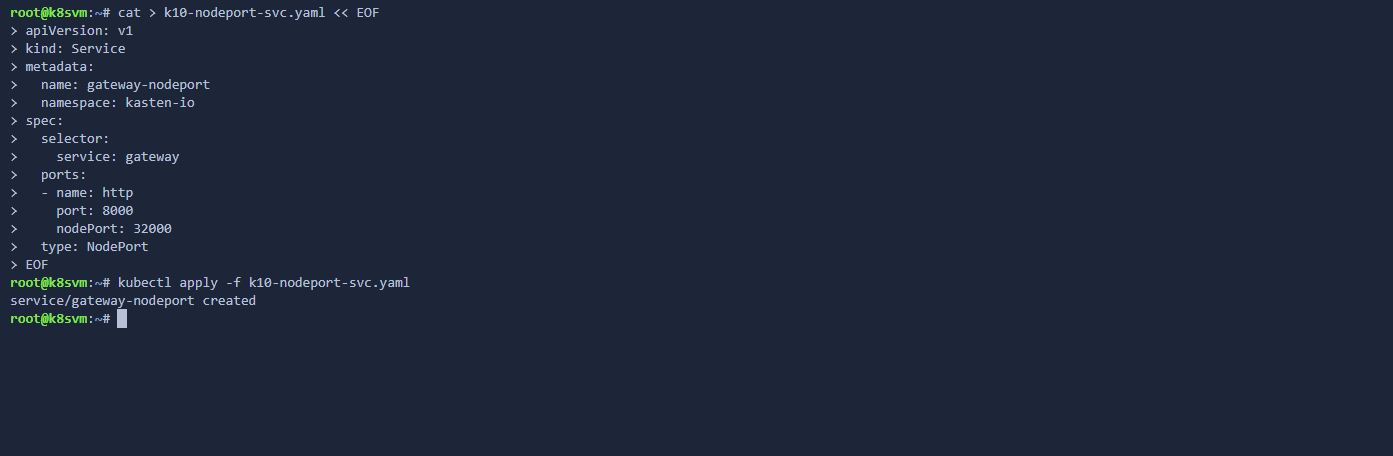
While not recommended for production environments, let's set up access to the K10 dashboard by creating a NodePort. Let's first create the configuration file for this:
cat > k10-nodeport-svc.yaml << EOF
apiVersion: v1
kind: Service
metadata:
name: gateway-nodeport
namespace: kasten-io
spec:
selector:
service: gateway
ports:
- name: http
port: 8000
nodePort: 32000
type: NodePort
EOF
Now, let's create the actual NodePort Service
kubectl apply -f k10-nodeport-svc.yaml
View the K10 Dashboard
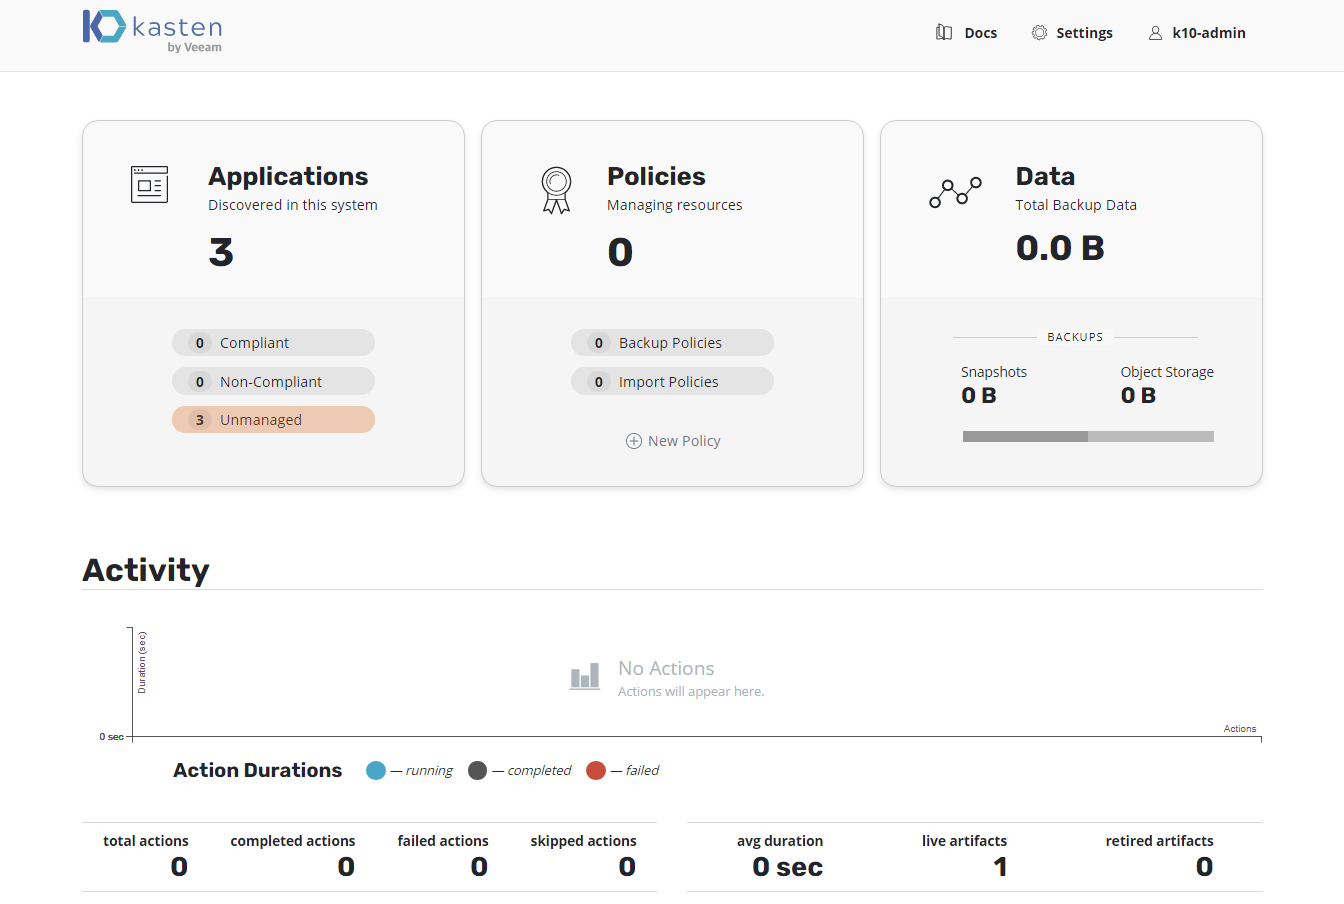
Once completed, you should be able to view the K10 dashboard in the other tab on the left. We recommend taking the K10 dashboard tour at this point.
Backup Policy Creation
We will now create a policy to backup MySQL to the previously configured object storage location.
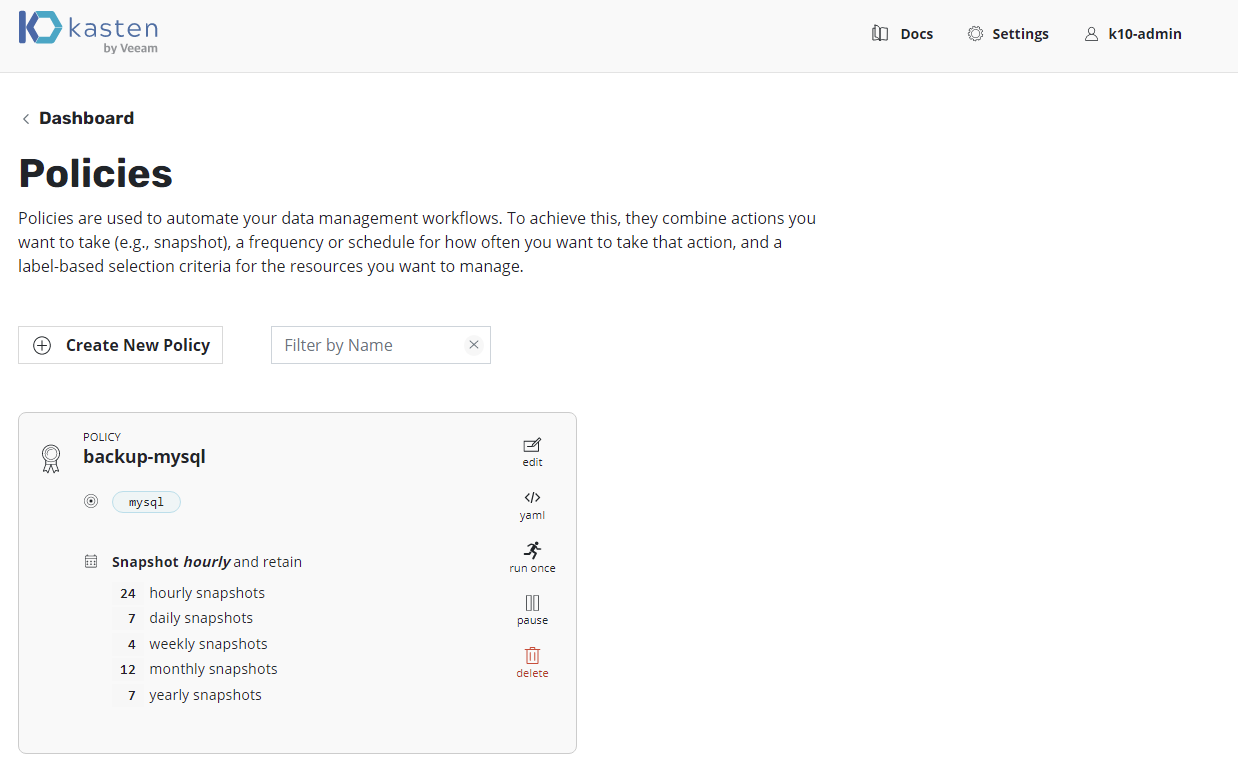
Creating a Policy
From the main K10 dashbboard, click on the Policies card. There should be no policies visible at this point.
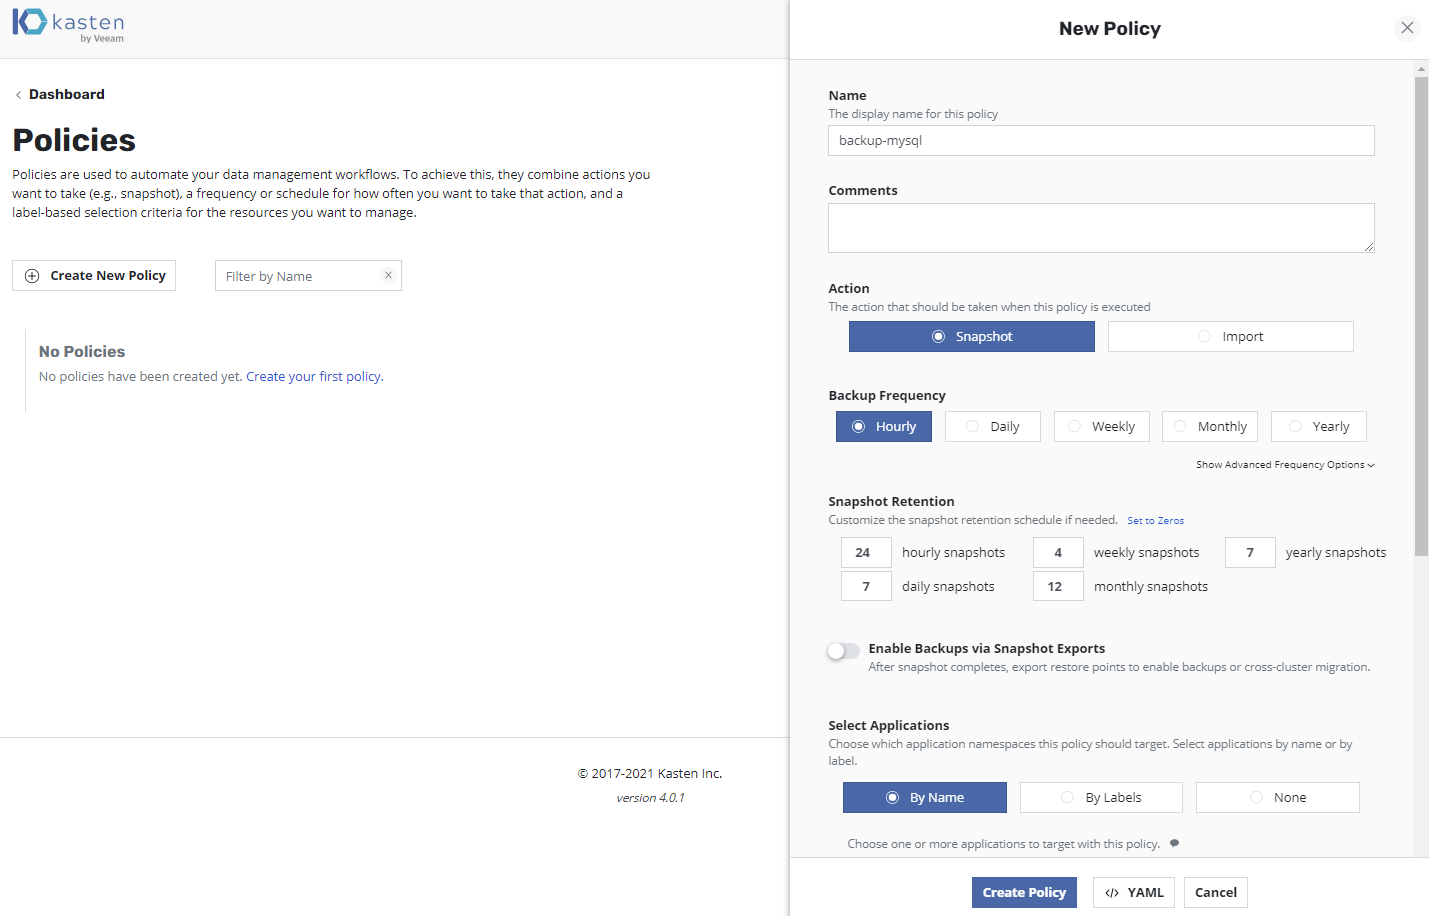
Click Create New Policy and:
- Give the policy a name (e.g., `backup-mysql)
- Select
Snapshotfor theAction - Select
Hourlyfor theAction Frequency - Leave the
Snapshot Retentionselection as-is - Select
By NameforSelect Applicationsand then, from the dropdown, selectmysql - Leave all other settings as-is and select
Create Policy
Running the Policy
The above policy will only run at the scheduled time (by default, at the top of the hour). To run the policy manually for the first time, click on Run Once on the Policies page. Confirm by clicking Run Policy and then go back to the main dashboard to view the job in action. Verify that the job has successfully completed.
Restore from Backup
Now that we have a MySQL backup, let's go simulate accidental data loss and then recover the system from that loss.
Causing Data Loss
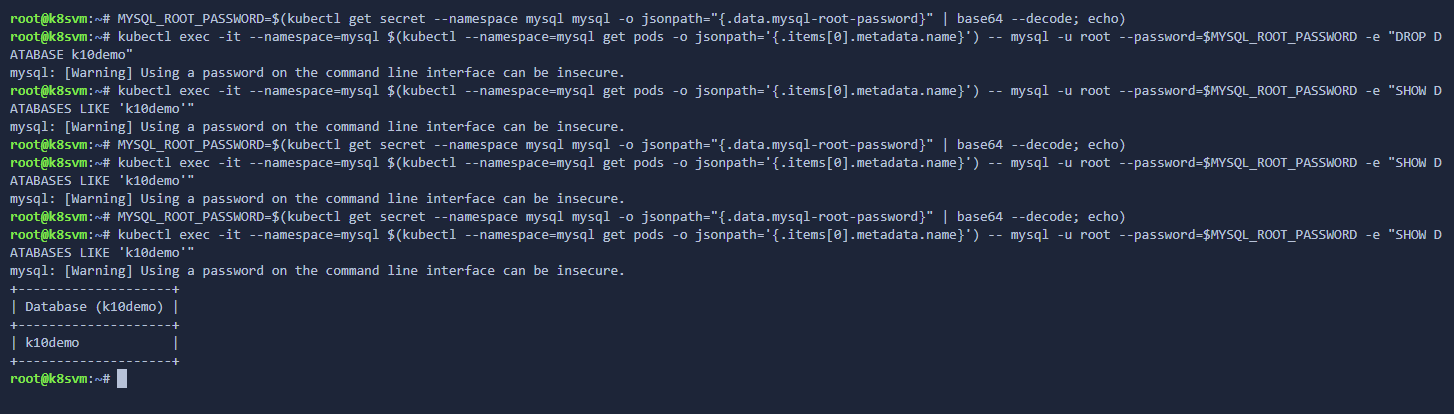
For the purposes of this test drive, we will simply drop the k10demo database we had created earlier.
<code>MYSQL_ROOT_PASSWORD=$(kubectl get secret --namespace mysql mysql -o jsonpath="{.data.mysql-root-password}" | base64 --decode; echo)
kubectl exec -it --namespace=mysql $(kubectl --namespace=mysql get pods -o jsonpath='{.items[0].metadata.name}') -- mysql -u root --password=$MYSQL_ROOT_PASSWORD -e "DROP DATABASE k10demo"
Verify that the database has been deleted by running:
<code>kubectl exec -it --namespace=mysql $(kubectl --namespace=mysql get pods -o jsonpath='{.items[0].metadata.name}') -- mysql -u root --password=$MYSQL_ROOT_PASSWORD -e "SHOW DATABASES LIKE 'k10demo'"

Recovering Data
To recover MySQL, go to the K10 dashboard, click Applications, and then select Restore on the MySQL card.
Click on a recent restore point and then select the Exported restore point (this is stored in the object storage system instead of as a non-durable snapshot on the storage system). In this case, we will select the default Application Name option to restore in place (Restore as "mysql"). Leave all other selections as-is, click on Restore, and confirm the action.
Return to the main dashboard to view the Restore job and verify that it completes successfully.

Verify Restore
To verify that our data was recovered, run the following command in the terminal to view the restored database:
<code>MYSQL_ROOT_PASSWORD=$(kubectl get secret --namespace mysql mysql -o jsonpath="{.data.mysql-root-password}" | base64 --decode; echo)
kubectl exec -it --namespace=mysql $(kubectl --namespace=mysql get pods -o jsonpath='{.items[0].metadata.name}') -- mysql -u root --password=$MYSQL_ROOT_PASSWORD -e "SHOW DATABASES LIKE 'k10demo'"